Tuesday, May 31, 2011

RCC5: Anything Goes

Happy Tuesday everyone! This long weekend has my days all confused and it truly feels like Monday lol!

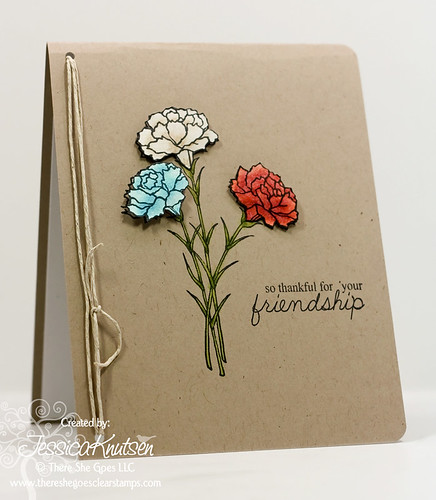
For today's card I have combined two different challenges- the TSG color challenge and the Ribbon Carousel's Anything Goes challenge.

The color challenge this week for TSG is to use Red, Teal and Ivory (just pretend that the green stems on my flowers aren't there lol!) Make sure you stop by the TSG blog for the details about this challenge as well as to find out how you can win a TSG gift certificate simply by playing along :)

This week's challenge on the Ribbon Carousel blog is Anything Goes. That's right, as long as you have ribbon, twine, thread, etc card- it counts! Make sure you stop by the blog for all the details.

5-31-11

Stamps: Forever
Ink: Momento Tuxedo Black
Paper: Kraft, white
Accessories: Corner rounder, twine, crop-o-dile, OMS, Prismacolor pencils, dimensionals, twine

Recipe:
* Create card base from kraft card stock, round corners.
* Stamp sentiment and image. Color stems of flowers
* Punch holes on top and bottom of left hand side of card, thread twine through holes a few times and knot in front
* Stamp flower tops on separate piece of card stock, color, cut out, and adhere to card base using dimensionals.

Sunday, May 29, 2011

Once Upon A Time

The newest stamp sets were just released last night on the TSG website! Today I have a little project to share with you that I've been working on over the last few days :)

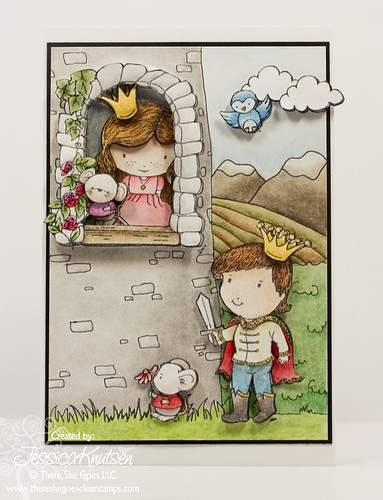
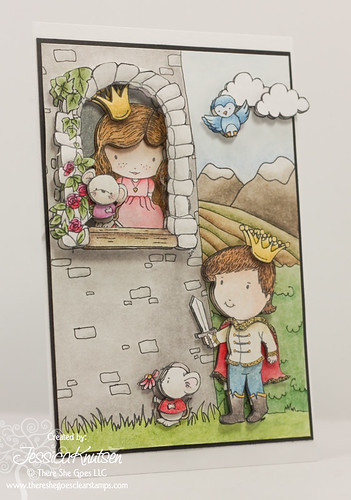
It's no secret that I loooove to combine TSG stamp sets to create different scenes and I gotta tell you, Once Upon A Time is going to see lots of ink :) The main part of my project starts out at around 4x6 inches and I combined 3 different TSG sets that you may have never thought of putting together.

I started by stamping images from the following stamp sets onto white card stock-
Once Upon A Time: window, prince, mouse (on ground)
Aim For The Clouds: mountain, clouds
Blossom By Blossom: grass under tower

I then used a Copic multiliner to draw in the rest of the scene like the tower, field below mountain and bush. When I was happy with that I colored the background. On a separate piece of card stock I stamped the images multiple times, colored, cut out and layered them together before adhering to the background. Some of you may think that this is a bit time consuming but honestly, this is my favorite type of stamping! I love the creativity that goes into looking at old stamp sets in a whole new light and find new ways to combine them to create a piece of art :)

For more ideas on how to use this as well as the other new stamp sets, make sure you stop by the TSG Tips & Tricks blog where you can download  a ton of different tip sheets using your favorite stamp sets!!! I have created a couple of different tip sheets featuring the Once Upon A Time set that will show you how I went about masking to be able to combine different images from this set together.
5-28-11-2 5-28-11
Ink: Momento Tuxedo Black
Paper: White card stock
Accessories: Prismacolor pencils, OMS, Dimensionals


Saturday, May 28, 2011

Join us tonight for the release party chat!

Join us right HERE in the TSG forum for the release party chat! The official chat doesn't begin until 6:00 PM (Pacific) but feel free to stop in at any time during the day to say hello :)

Friday, May 27, 2011

You still have time to win stamp sets!!

You still have time to win the new stamp sets before they are available to buy Saturday evening! Play along in our Blog Hop Challenges for your chance to win the stamp set being featured in that hop :)


Thursday, May 26, 2011

Once Upon A Time sneak peeks!


Are you guys ready for our last and final day of sneak peeks before the release on Saturday??? I gotta tell you, I have been having SO much fun creating with this stamp set and I know that I'm going to be sharing lots of cards made using it in the near future :D

Did you make your way here from the crazy talented Iwona's blog? If so great! If not, you may want to head back over to the TSG Blog for all the details about this Blog Hop Challenge and to find out how you can win the set being shown off today!

Once Upon A Time is a 4x8 stamp set that includes a total of 15 of stamps and will sell for $18.

Di and I have embarked on a new line for her stamps with TSG and they are all about making scenes! If you know anything about me and my stamping, you know that I loooooove combining different stamp sets to create new scenes!! The first set in this collection is an adorable prince/princess theme that has soooo many possibilities and you are going to have so much fun creating with it :)
Jessica 
Now hop on over to my girl Jessie's blog to see the eye candy that she has for you!

Stamps: Once Upon A Time (to be released 5-28-11)
Ink: Momento Tuxedo Black
Paper: White, Black, Grey, DP by My Mind's Eye
Accessories: Corner rounder, dimensionals, SU scallop border punch, rhinestones, Stickles, Diamond glaze, Prismacolor pencils, OMS, Copic multiliner

Recipe:
* Create card base from grey card stock. Cut grey DP layer to be slightly smaller and adhere to cardbase.
* Mask images and stamp to create beginning part of scene. Draw in the rest with a Copic multiliner. Color and blend.
* Mat image layer onto white card stock then scalloped black card stock before adhering to card base.
* Stamp sentiment onto separate strip of cardstock, color, blend, and adhere to card base. Add rhinestones.
* Add Diamond glaze and Stickles where desired to give image extra texture.

Wednesday, May 25, 2011

Forever sneak peek!

Are you guys ready for day two of our sneak peeks??? Today we are showing off a gorgeous carnation set illustrated by Torico. I know it is going to become a favorite of your flower stamp collection! And know what the best part is? It's a mini set that will only cost you $7!!!!

Did you make your way here from the way-to-talented Iwona's blog? If so, you are right where you need to be :) If not, you may want to head back over to the TSG Blog for all of the details about this Blog Hop Challenge as well as to find out how you can win the set being shown off today!

Forever is a 3x4 stamp set that includes a total of 5 of stamps and will sell for $7.

I gotta say, the card I made for today took a bit of time to create but I absolutely LOVE how it turned out! It's simple yet has just enough depth and texture to really stand out :)
Jessica 
Now hop on over to the lovely Jessie's blog to check out what sneaky-peeky she's got to share with you!

Stamps: Forever (to be released (5-28-11)
Ink: Momento Tuxedo Black
Paper: Early Espresso, White, Pink Pirouette, retired SU DP
Accessories: Edge distressor, Sewing machine, button, twine, dimensionals, SU scallop border punch, corner rounder, Prismacolor Pencils, OMS

Recipe:
* Create card base from Early Espresso card stock, round right side corners
* Stamp image onto white card stock, color around flower for shading, color stems, blend, stitch edges, mat with pink card stock and then again with brown scalloped edge card stock.
* Cut pink DP layer to be smaller than card base, round right corners and adhere the image panel to top of it.
* Wrap twine around the adhered layers twice before adhering to card base. Thread twine through button, tie a bow and adhere to cardbase with strong adhesive.
* Stamp sentiment onto seperate piece of white card stock, distress edges and adhere to image panel with dimensionals.
* Stamp flower onto seperate piece of white card stock, color different sections that will be cut out and layered onto the card base using dimensionals.


Tuesday, May 24, 2011

Freeze The Moment sneak peek!!

*First of all I would like to thank the wonderful Crafty Math Chick for coordinating such a wonderful (surprise!) Birthday Blog Hop as well as those of you who participated in it!! I am still making my way through to comment on all of the fabulous cards and I can't even tell you how much I appreciate each and every one of you <3 <3 <3 *

Welcome to the first day of There She Goes Clear Stamps sneak peeks! Our first Blog Hop Challenge for this release is an adorably sweet set set illustrated by the fabulous Melyssa Connolly. 

If you arrived here from Iwona's blog, you are on the right track! If not, you may want to head on over to the TSG Blog for all of the details about this Blog Hop Challenge as well as to find out how to win the stamp set being shown off today :D 

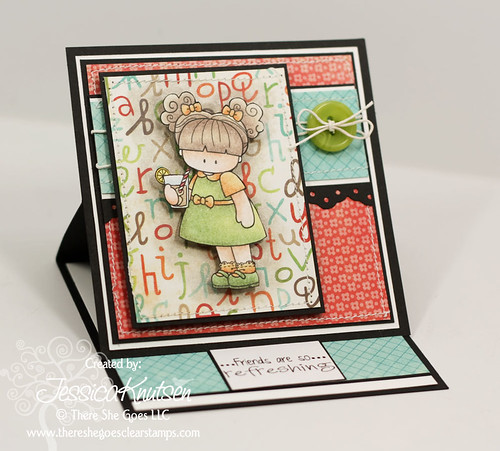
Freeze the Moment is a 4x8 stamp set that includes a total of  29 stamps and will sell for $18.
Jessica

The next stop on this sweet hop is my lovely friend Jessie!

Stamps: Freeze The Moment (to be released 5/28/11)
Ink: Momento Tuxedo Black
Paper: Lime Twist DP by My Mind's Eye, black, white 
Accessories: Prismacolor Pencils, OMS, button, twine, sewing machine, dimensionals, SU border punch.

Recipe:
* Create Easel card base by following  the tutorial found here on SCS
* Make a card front and adhere to card base.
* Decorate inside of card to coordinate with card front


Wednesday, May 18, 2011

Garden Of Friends / Sentimental Thank You

It has been sooooo long since I've played in a TSG Challenge so I was so happy to see the SCS Sketch challenge show up in my email inbox just as I was getting ready to stamp :) Matt bought me a complete 132 set of Prismacolor pencils for an early birthday present so I knew that I had to chose an image that would let me use lots of colors! It's been ages since I've shown Garden Of Friends stamp set some love so I combined it with the newer mini set Sentiment Thank You for the greeting :)

SC333
Stamps: Garden Of Friends, Sentimental Thank You
Ink: Momento Tuxedo Black, Toffee, Early Espresso
Paper: Kraft, white, DP by My Mind's Eye
Accessories: Nestabilities, Sewing machine, dimensionals, sponge, Prismacolor pencils, OMS, SU scallop border punch,

Recipe:
* Create card base from kraft card stock
* Cut pink layer, stitch edges and mat with white card stock. Adhere to card base.
* Cut purple layer, stitch edges, mat with white and kraft card stock. Adhere to card base.
* Stamp lager flower three times onto white card stock, color, blend, cut out and adhere to purple layer with dimensionals.
* Die cut shape with Nestabilities, stamp image, color/blend, sponge Toffee and Espresso ink using the Nestability as a frame while sponging.
* Stamp sentiment onto strip of white card stock, scallop one edge, stitch to image. Adhere entire panel to card base using dimensionals.


Tuesday, May 17, 2011

RCC3: Clean and Simple


Happy Tuesday and welcome to another Ribbon Carousel challenge! This week we are keeping things nice and easy on you by having you create a clean and simple card that features ribbon.

For my card, I used the mini set Kindred Spirits- I just love these flowers!


 Stamps: Kindred Spirits
Ink: Momento Tuxedo Black
Paper: DP by My Mind's Eye, White cardstock, Black cardstock, kraft
Accessories: Ribbon, scallop corner punch, Prismacolor pencils

Recipe:
*Create card base from kraft cardstock, scallop top corners
*Cut strip of aqua DP, mat in black, tie ribbon around and adhere to cardbase
*Stamp flowers onto DP, shade with pencils, cut out and adhere to card base


Monday, May 16, 2011

Blossom By Blossom

Join us tonight right here in the TSG Forum for our weekly Friday Night Chat!
Everyone is welcome and we love to meet new people :)

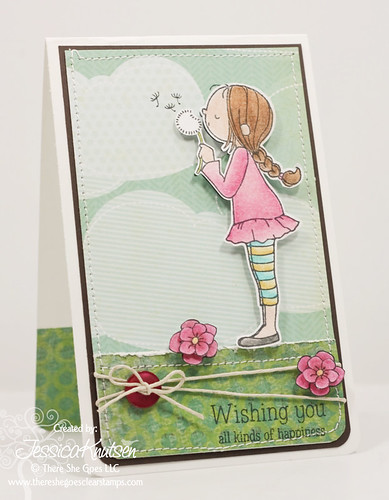
And here is a sweet card made with one of the new stamp sets illustrated by Torico called Blossom By Blossom.
5-3-11
Stamps: Blossom By Blossom
Ink: Momento Tuxedo Black
Paper: Scraps from my stash, white, Early espresso
Accessories: Button, Twine, Dimensionals, Edge distressor, sewing machine, Prismacolor Pencils, OMS, corner rounder

Recipe:
* Create card base from white card stock, round corners
* Create cloud DP panel, round corners, stitch and matt on Early espresso. Adhere to card base.
* Create green dot layer, round bottom corners, distress top edge and stitch. Wrap twine around. Adhere to card base.
* Thread a button with twine and tie a bow. Adhere to wrapped twine on card base.
* Stamp image onto white card stock, color, cut out, adhere to card base with dimensionals.
* stamp flowers onto white cardstock, color, cut out, layer and adhere to card base using dimensionals.

TSG107- Inspiration Challenge from Tammy

It's Monday once again which means it's the start of a new TSG Challenge! This week is another inspiration challenge but this time is brought to us by Tammy. I love the colors of the flowers surrounding the bird and knew right away that I wanted to use the oldie but goodie set- Happy Day.

Stop by the TSG Blog for all of the details about the challenge and to find out how you can win a TSG gift certificate simply by playing along!
IMG_9963
Stamps: Happy Day
Ink: Momento Tuxedo Black
Paper: White, DP by My Mind's Eye
Accessories: Scallop corner punch, rhinestones, dimensionals, Prismacolor pencils, OMS, SU scallop border punch, sewing machine

Recipe:
* Create card base from white cardstock, use blue pencil to lightly color in sky, blend, punch corners.
* Create polka dot layer, scallop punch top, stitch edges.
* Cut strip of striped DP, stitch edges and mat on white paper before adhering to dot layer.
* Color three thin strips of white cardstock with blue pencil, blend and adhere to striped layer. Adhere rhinestones.
* Stamp image once onto white card stock, color in tree trunk.
* Stamp top of tree onto dot DP four times, cut out, shade with pencil and layer together onto colored tree trunk layer. Adhere to card base.
* Adhere DP layer to bottom of card base.


Sunday, May 15, 2011

Blossom By Blossom

Hello everyone, I hope that you have enjoyed your weekend so far! I wanted to share this card that I made a week or so ago using the image that I created for a new TSG Tips & Tricks sheet which you can download for FREE right here!!

5-4-11
Stamps: Blossom By Blossom
Ink: Momento Tuxedo Black
Paper: My Mind's Eye, White, Black
Accessories: Prismacolor pencils, dimensionals, corner rounder, ribbon

Recipe:
* Create card base from white cardstock, round the bottom corners. Stamp image in the middle, color in the sky and grass, blend.
* Cut strips of DP. Adhere ribbon/bow to the top layer, round corners of bottom layer. Adhere to card base.
* Stamp image multiple time on seperate piece of cardstock, color, blend, cut out and layer using dimensionals. Adhere to card base.

Tuesday, May 10, 2011

RCC2: Shabby Chic-ness!


Welcome to week number two of the Ribbon Carousel Challenge! This week is all about shabby chic which can be anything vintage like lace, crochet ribbon, edge distressing etc. You can find out all the info about this challenge right here on the RCC Blog!
This card may look a bit familiar to you because the focal point is actually an ATC that I made for the TSG Mother Of All Blog Hops that took place this weekend. I absolutely love how the ATC turned out and I knew that it would be perfect for today's RC challenge. It was rather easy turning this bad boy into a card and I think that the end result is very shabby chic indeed :)
RCC2 
Ink: Momento Tuxedo Black, Momento Toffee, Early Espresso
Paper: DP by DCWV, kraft, black
Accessories: Edge distressor, lace ribbon, sewing machine, dimensionals, sponge, adhesive pearls

Recipe:
* Create ATC by cutting DP, sponging edges in brown inks, stamping images/sentiments, distress edges and mat on black cardstock
* Create card base from kraft cardstock
* Sponge lace ribbon in Toffee ink
* Create new layer from kraft cardstock, sponge edges in brown inks, sew ribbon (kind of pleating it as you go) down the length of the card, adhere to cardbase.
* Adhere ATC to card base using dimensionals. Add adhesive pearls.

Monday, May 9, 2011

TSG106 Inspiration Challenge- Christine

Today's TSG challenge is this fabulous inspiration piece brought to us by our Trendsetter of the week- Christine! I love these bright colors as well as the lines and as soon as I saw this picture, I immediately thought of the Welcome Home stamp set.

Make sure you stop on by the There She Goes blog for all the info about this challenge as well as to find out how you can win a TSG gift card simply by playing along!

This card came together pretty easily for me and I love the bright, bold colors as well as the off center angle of the image panel.
5-9-11
Stamps: Welcome Home
Ink: Momento Tuxedo Black
Paper: Lime Twist My Mind's Eye, White, Black
Accessories: Dimensionals, Prismacolor pencils, sewing machine, ribbon

Recipe:
* Create cardbase from white cardstock. Cut red dp layer, stamp sentiment in lower corner, stitch around edges and mat on black, add yellow DP strip to red layer. Adhere to cardbase using dimensionals.
* Stamp images onto white cardstock, color with Prismacolor pencils, blend, mat on black, add ribbon tabs to side and adhere to cardbase using dimensionals. 


Saturday, May 7, 2011

It's the Mother Of All Blog Hops!!!!

Welcome to the 2nd annual Mother of All Blog Hops sponsored by There She Goes Clears Stamps! I know that you have a lot of hopping to do so I will keep this short and sweet but first of all I have to give a HUGE thank you to the amazing Holly for organising this entire MOABH!! It was a lot of hard work pulling everything together and she did a wonderful job, thank you Holly :D 

If you’ve arrived here from the TSG Blog, you are in the right spot! If not, you will want to head over there in order to find out what you need to do to be eligible for the prizes we are offering!

Since this is the Mother Of All Blog Hops and Mother's Day weekend, I thought that it was only right that my  little ladies play along with us in this fun hop. We had a great time crafting together making these artist trading cards and the girls always love getting to play with TSG stamps :) I did lots of cutting, masking and glittering (yes, it is a word ;) but they directed me what paper to use and where the pictures needed to go lol.

Made by me

Mady by Chloe

Made by me

Made by Kylie

Top: Kayla     Bottom: me

Now it’s time to hop over to Meredith's Blog! Did you know that one of the reasons she started her blog was so that she could participate in the MOABH? Now that's dedication! Make sure you give her a warm welcome when you stop by her blog :)

Thank you for stopping by!


Friday, May 6, 2011

That's right the official start to the Mother Of All Blog Hops will begin first thing Saturday!!! What? You haven't heard of MOABH yet?! Boy are you missing out! Read the info below so you don't miss out on your chance at winning prizes valued at over $400 :)

 
(click to enlarge)

And don't forget to join us right here in the TSG Forum as we get ready to countdown the start of the MOABH! Everyone is welcome and we love to meet new people :)


Thursday, May 5, 2011

RCC1: Ribbon Carousel Inspiration Challenge

Wednesday already??? I've been so insanely busy for the last week that my days are completely melding together!

Have you guys heard the news? Our very own Corinna has asked me to join her first design team for her amazing new product - the Ribbon Carousel! You can see a list of the rest of the talented design team in my side bar :)

The first challenge as part of the Carousel Crew is to be inspired by the Ribbon Carousel. I chose to actually take my inspiration from the website/blog and used black/grey striped paper, a splash of pink and a colorful flower :) You can hop on over to the Ribbon Carousel Challenge Blog for all the info on this challenge as well as see more examples from other DT members!!

This card also qualifies for this week's TSG Challenge which is to use 3D flowers, wahoo- go me! lol!
Stamps: What's Up Buttercup?
Ink: Momento Tuxedo Black, Momento London Fog
Paper: White, Basic Grey, Melon Mambo, DP by My Mind's Eye
Accessories: SU Scallop border punch, SU word punch, ribbon, button, embroidery thread, dimensionals, sewing machine, Prismacolor pencils, SU marker, corner rounder, Stickles

Recipe:
* Create card base from white card stock, round corners
* Cut strip of grey DP the width of card base, sew ribbon on top half, mat in Melon Mambo and grey punched from grey card stock.
* Stamp buttercup flower bunch in London Fog across bottom of card base, adhere grey DP layer on top of images.
* Stamp sentiment onto separate white card stock, punch, and adhere to grey panel with red line tape.
* Use embroidery thread to tie ribbon on button and adhere to sentiment.
* Stamp large buttercup image three times on polka dot DP, shade with pencil then SU marker. Cut different sections to layer and adhere together with red line tape and dimensionals. Adhere to card base using dimensionals. Add glitter.